Creating your first automation journey in Ortto does not have to be complicated. When you understand the basic structure of a journey, you can start building automated experiences that welcome leads, nurture prospects, onboard users, and support customer retention. Ortto gives marketers a flexible visual builder that allows you to trigger campaigns based on actions, audiences, filters, dates, and customer behavior.
For many businesses, the first automation journey is the starting point for a stronger lifecycle marketing strategy. Instead of manually sending follow-ups or trying to manage every customer interaction one by one, you can use Ortto to create a system that responds automatically and intelligently. The key is to begin with a simple goal, build a clean workflow, test it carefully, and improve it over time.
Why Your First Ortto Journey Matters
Your first journey is important because it sets the foundation for how you use automation in the future. A well-built journey can save time, improve customer engagement, and help your team deliver more relevant communication at scale. It also helps you understand how entry rules, delays, conditions, and messaging work together inside the Ortto platform.
When businesses rush into complex automation too early, they often create workflows that are difficult to maintain and hard to measure. Starting with a simple journey makes it easier to learn the platform and identify what drives results. Whether you are in SaaS, ecommerce, or service-based marketing, your first journey should focus on one clear objective and one specific audience.

What is an Automation Journey in Ortto?
An automation journey in Ortto is a workflow that moves contacts through a sequence of actions based on defined triggers and conditions. These actions can include emails, SMS messages, push notifications, delays, filters, conditions, splits, widgets, and other workflow steps. A journey can begin when someone fills out a form, joins an audience, matches a filter, receives a tag, reaches a renewal date, or meets another condition inside your data setup.
In simple terms, a journey helps you automate communication based on what your contacts do or who they are. Instead of sending the same message to everyone, you can create a path that changes based on behavior, timing, and customer stage.
Before You Build Your First Journey
Before opening the journey builder, take a moment to define the purpose of the automation. This step is often skipped, but it makes the biggest difference in the quality of the final workflow. A journey without a clear goal quickly becomes confusing.
You should be able to describe the purpose in one sentence. For example, you might say that the goal is to welcome new leads after a demo form submission, onboard free trial users over 14 days, or re-engage inactive contacts who have stopped opening emails. When the goal is specific, the automation becomes easier to structure and easier to measure.
Questions to Answer First
Before building your first journey, think through a few basics:
- Who should enter the journey?
- What action should trigger the journey?
- What message should they receive first?
- How long should they wait before the next step?
- What should happen if they engage or do not engage?
These questions help you avoid building a messy workflow with too many unnecessary branches.
Best First Journeys to Build in Ortto
If you are new to Ortto, the best first automation is usually one of the following:
- A welcome journey for new leads
- A trial onboarding sequence
- A post-form follow-up journey
- A customer renewal reminder
- A basic lead nurturing workflow
These are practical, easy to understand, and useful for most businesses. They also give you a chance to learn the core logic of automation without making the journey too large or too technical.
How to Start a New Journey in Ortto
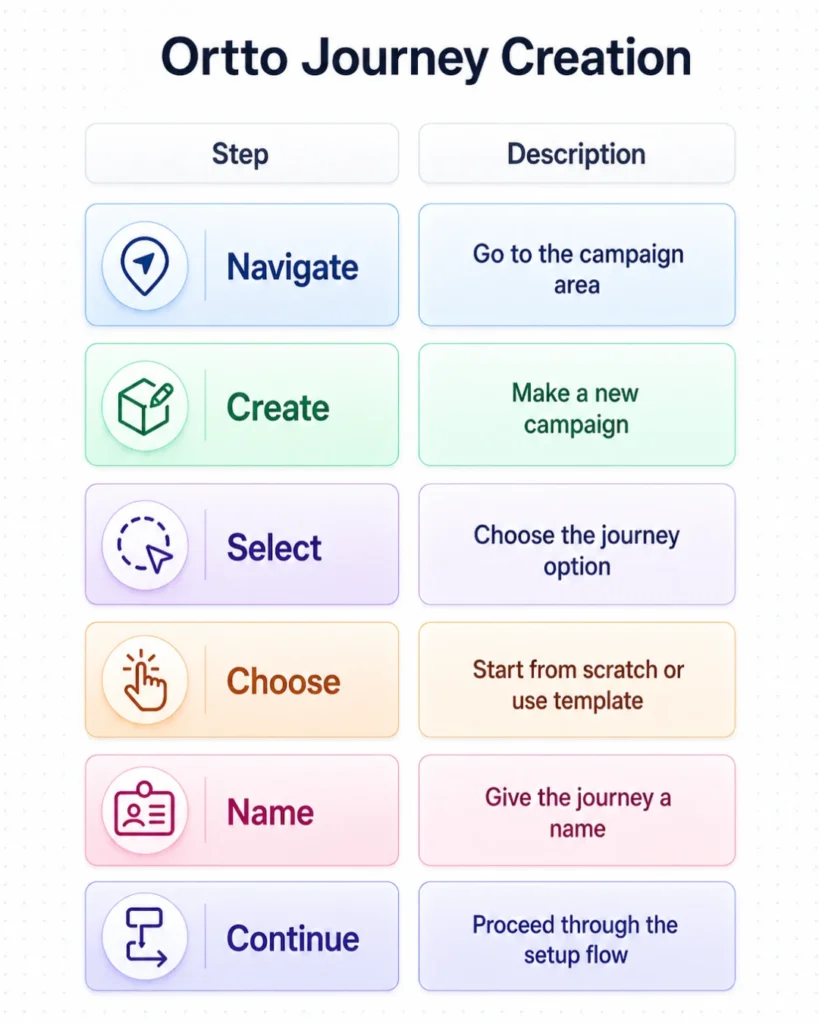
Ortto allows you to create a new journey from the campaign area inside the platform. You begin by navigating to the campaign section, creating a new campaign, selecting the journey option, and then choosing whether to start from scratch or use a template. After that, you give the journey a name and continue through the setup flow.
For your first build, starting from scratch is often the better choice. Templates can be helpful, but a clean manual setup gives you a better understanding of how the logic works. It also helps you learn how every step connects.
Use a Clear Naming Convention
Naming matters more than many teams realize. A generic name like “Welcome Flow” may work today, but it becomes less helpful when you have ten or twenty automations running. A more specific name makes future reporting and management much easier.
Good examples include:
- Demo Form Welcome Journey
- Trial User Onboarding Sequence
- Renewal Reminder Automation
- New Lead Nurture Journey
Clear naming improves internal organization and makes reporting easier later.
Choose the Right Entry Criteria
The entry criteria determine who enters the journey and when they enter it. This is one of the most important decisions in your automation setup because it controls the start of the customer experience.
Ortto supports multiple entry methods, which can include contacts entering based on filters, audiences, form submissions, activities, tags, dates, and recurring schedules. For first-time users, the easiest triggers are usually form submission, tag application, or audience entry because they are easier to test and easier to understand.
Good Entry Points for Beginners
These entry points are usually the easiest place to start:
- Form submission
- Tag added
- Audience joined
- Specific customer activity
- Date-based reminder
If you choose a trigger that clearly reflects user intent, the rest of the journey becomes much more effective.
Build the Basic Journey Structure
Once the entry criteria are in place, you can start building the flow itself. This is where you add the actual steps contacts will move through. A basic first journey should be simple and easy to follow.
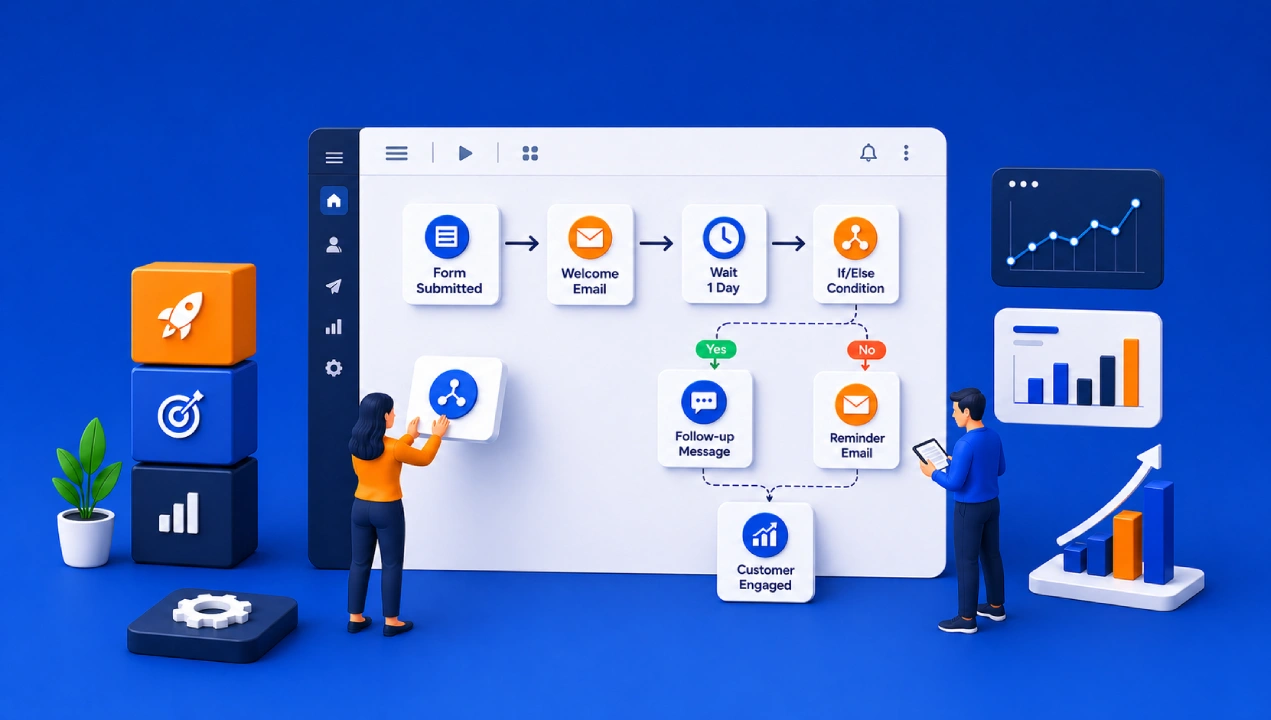
A strong beginner workflow might look like this:
- Contact submits a form
- Welcome email is sent
- Delay of one or two days
- Condition checks whether the email was opened or clicked
- Follow-up email is sent based on engagement
This kind of structure is easy to launch, easy to test, and useful in many marketing scenarios.
Keep the First Version Simple
One of the most common mistakes is trying to make the first journey too advanced. It is better to launch a short, effective automation than to spend weeks building something overly detailed that never goes live.
For your first journey, try to keep it limited to:
- One trigger
- One main goal
- One or two emails
- One delay
- One simple condition
This gives you usable automation without creating unnecessary complexity.
Key Journey Elements You Will Use
Ortto gives you several building blocks that shape the customer journey. Understanding these core elements makes the platform much easier to use.

The email step allows you to send an automated message inside the journey. This is often the first shape used in beginner workflows, especially for welcome campaigns, nurture flows, and onboarding journeys.
Delay
A delay holds the contact for a set period before moving to the next step. This prevents messages from being sent too quickly and helps create a more natural experience.
Condition
A condition checks whether something is true or false. For example, it can determine whether someone opened an email, clicked a link, or met a specific customer rule.
Filter
A filter helps narrow the path based on data or behavior. This is useful when you only want certain contacts to continue.
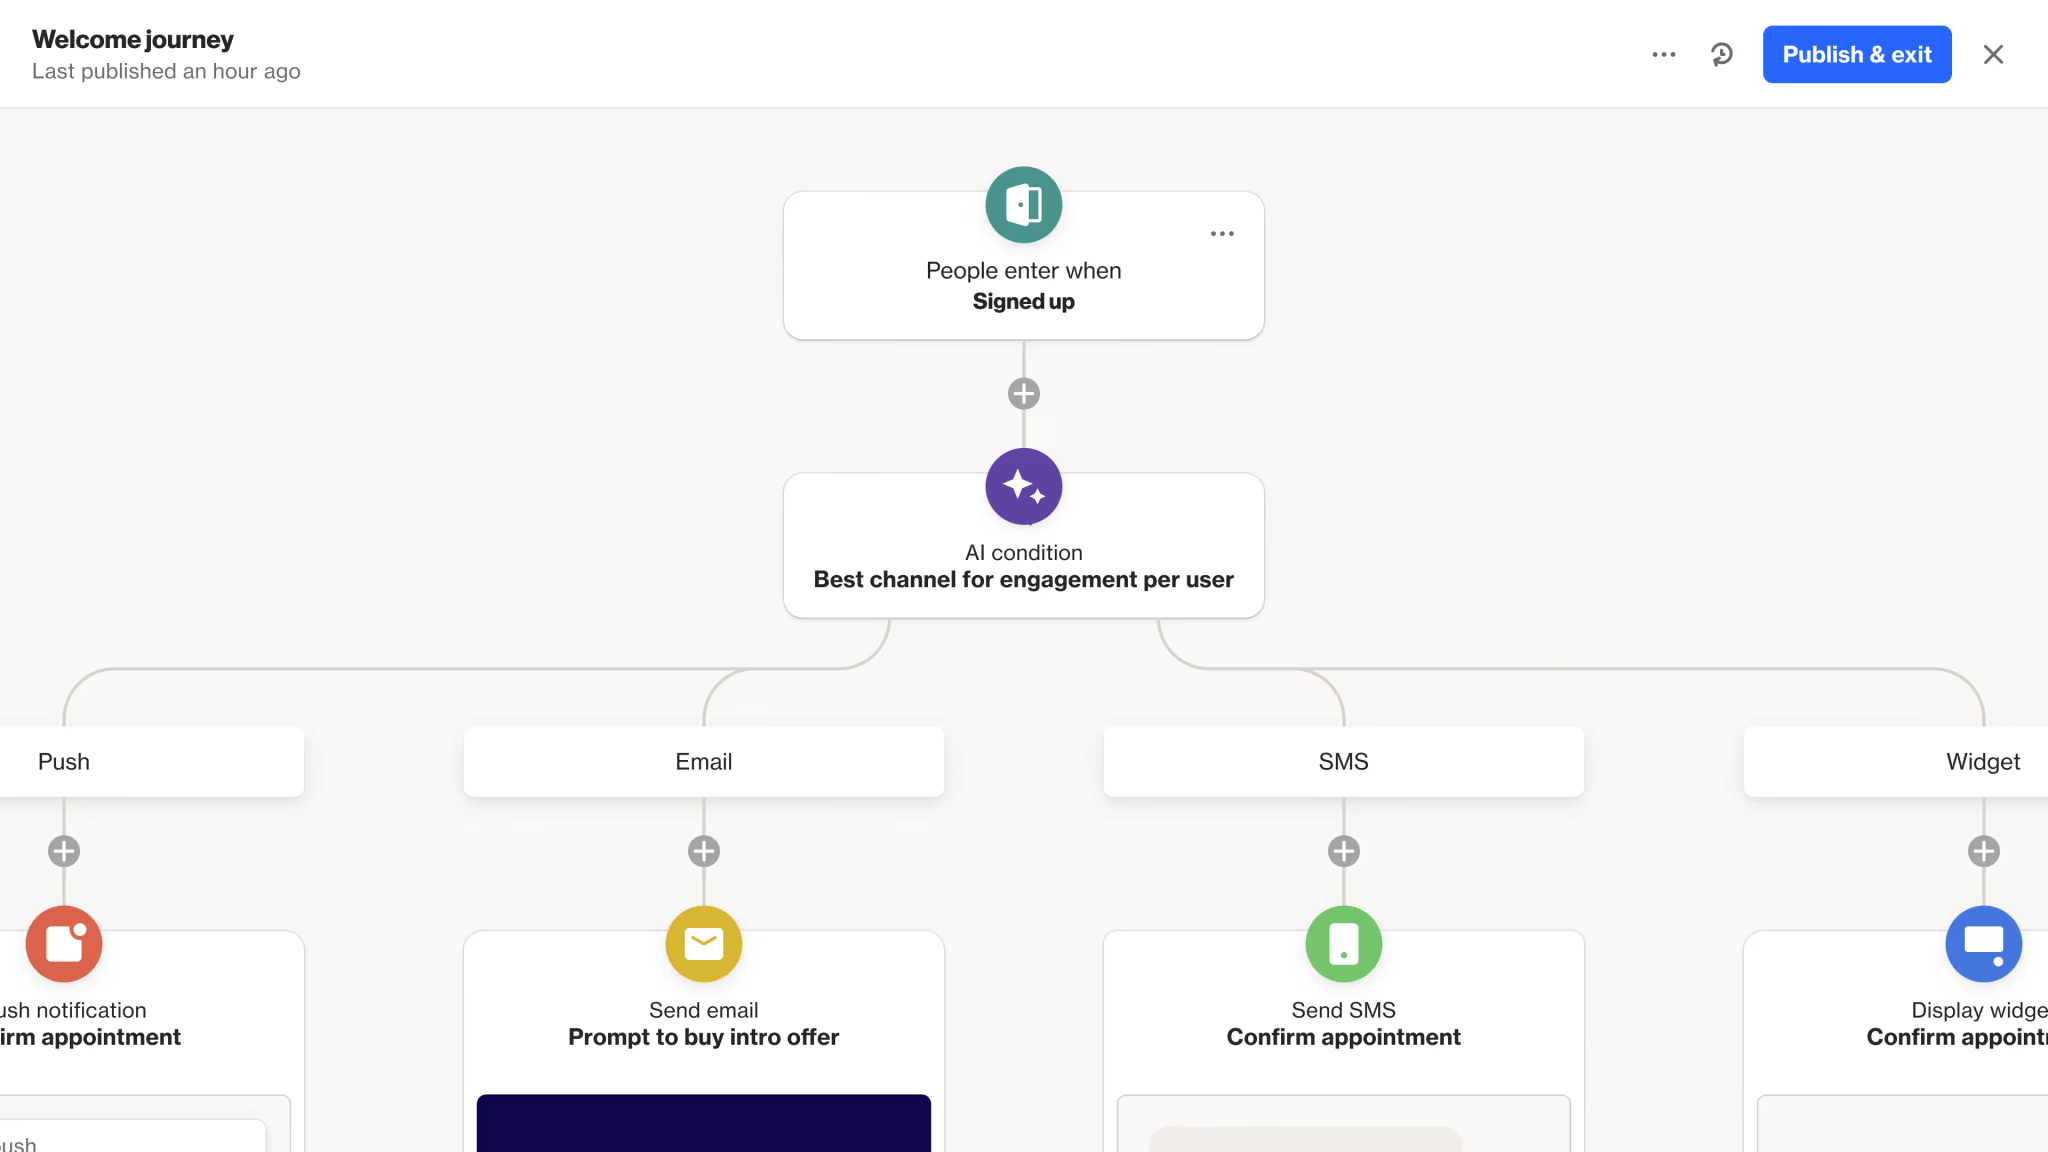
Split
A split creates multiple paths in the journey. This allows you to personalize the workflow based on engagement, customer type, or another decision point.
SMS or Push Notification
If your communication strategy includes more than email, you can also add SMS messages or push notifications into the journey.
Use Delays to Improve Timing
Timing plays a major role in automation performance. Sending the next message too quickly can overwhelm the contact, while waiting too long may reduce relevance. Delays help you control the pacing of the journey.
For example, a welcome email can be sent immediately after a signup, while a product education email may work better after one or two days. A reminder message may need to be tied to a dynamic event like a renewal date. Once you learn how to use delays properly, your automations start to feel more natural and more strategic.
Use Conditions to Personalize the Experience
Conditions are what transform a simple drip campaign into a smarter customer journey. Instead of sending everyone through the exact same path, you can change the experience based on behavior.
Examples of Useful Conditions
You can use conditions to check things like:
- Did the contact open the email?
- Did the contact click a link?
- Did the person complete a key action?
- Is the contact in a certain audience?
- Has the renewal date passed?
This gives you the ability to send different follow-up messages to engaged and unengaged users, which usually leads to better results.
How to Test Your Journey Before Launch
Testing is one of the most important steps in the process. Before switching the journey on, you need to confirm that the trigger works, the emails are correct, the delays make sense, and the conditions route contacts the way you expect.
A journey may look perfect in the visual builder and still fail in live use if the trigger is wrong or the path logic is incomplete. That is why testing should be treated as a required part of launch, not an optional step.
What to Check During Testing
Before activation, review the following:
- Entry trigger logic
- Email content and links
- Delay timing
- Conditions and branch paths
- Internal notifications
- Exit flow or completion logic
When these pieces are tested properly, the launch becomes much safer and smoother.
How to Launch Your First Ortto Journey
After testing is complete, you can switch the journey on and allow contacts to start entering the workflow. If the journey is scheduled, it can also activate automatically at the selected date and time.
An evergreen journey is usually the best choice for a first-time build. This means the automation runs continuously as new contacts meet the entry criteria. Evergreen journeys are easier to monitor, easier to improve, and more useful for long-term lifecycle marketing.
Common Mistakes to Avoid
Many first-time automation journeys fail not because the tool is difficult, but because the structure is not clear. A few small mistakes can make a big difference in performance and usability.
Avoid These Early Errors
- Using a vague goal
- Choosing the wrong trigger
- Adding too many branches too early
- Sending too many messages
- Skipping testing before launch
- Naming the journey too broadly
- Forgetting to review performance after launch
Avoiding these mistakes will make your first Ortto journey much more effective.
Tips for a Better First Journey
A successful first journey is usually simple, intentional, and built for learning. It does not need to be your most advanced automation. It just needs to work well and support a clear business goal.
Best Practices to Follow
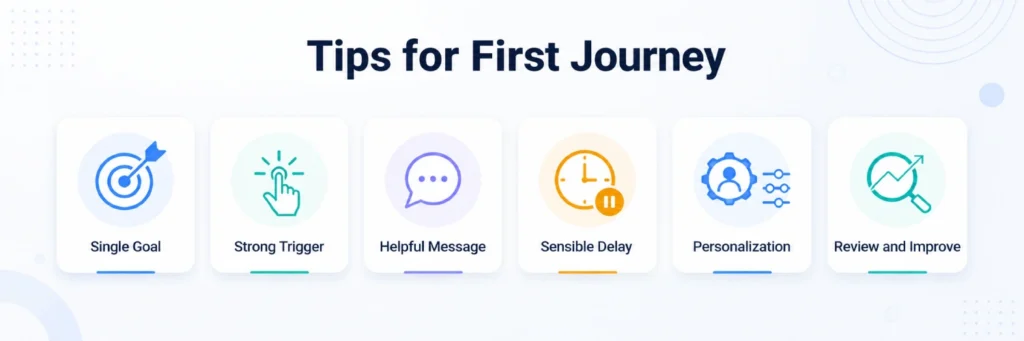
- Start with one goal only
- Use a trigger that reflects strong user intent
- Send a helpful first message
- Add a sensible delay
- Use one condition for personalization
- Review results and improve over time
These best practices help you get value from the platform faster without getting stuck in overbuilding.
How Ortto Consulting Can Help
If your business wants to get more value from Ortto without spending months figuring out the best setup alone, working with a specialist can help. Ortto Consulting focuses on Ortto implementation, automation strategy, email and SMS setup, reporting, and customer data structure. That kind of support can be especially useful if you want to build journeys that are not only technically correct, but also aligned with lead generation, conversion, onboarding, and retention goals.
For growing businesses, expert guidance can shorten the learning curve and help turn automation into a real performance channel instead of just another tool in the stack.
Final Thoughts
Your first automation journey in Ortto should not be the most complicated workflow you ever build. It should be the one that helps you understand the platform, launch something useful, and create momentum. Start with a simple trigger, a focused goal, one or two messages, and a basic decision point. Once that foundation is live, you can expand with more personalization, more channels, and more advanced automation logic.
The best way to begin is not to build everything at once. It is to build one journey that works.